


Cart is empty


Introduction
abjd.store is a multivendor Marketplace platform that provides market access and penetration to all types of vendors and sellers to reach a wider segment of customers with a high reach volume and traffic.
The major endeavor of vendors and sellers when opening their own online stores is how to bring traffic to their website, most online stores open and do not succeed without being ever noticed by customers. Moreover, setting up online payment methods becomes a major endeavor for small vendors and sellers, not mentioning the cost of maintaining an online store and all the headache of its logistics.
As for customers, fragmentation is frustrating, people don’t want to navigate multiple websites and online stores to buy an item, they want to see all options in one place, compare offers, sellers, variations etc. all in one place.
abjd.store Marketplace provides solutions to all the above problems, customers get a consolidated view of all products from multiple vendors and sellers in one place, can make comparisons and chose the best fit product with one click. sellers can reach more customers, have high traffic on their products and offerings and get access to online payment methods and never worry about the logistics of having their own website and store. Your store is hosted on abjd.store for FREE, you pay when you sell.


Subscriptions
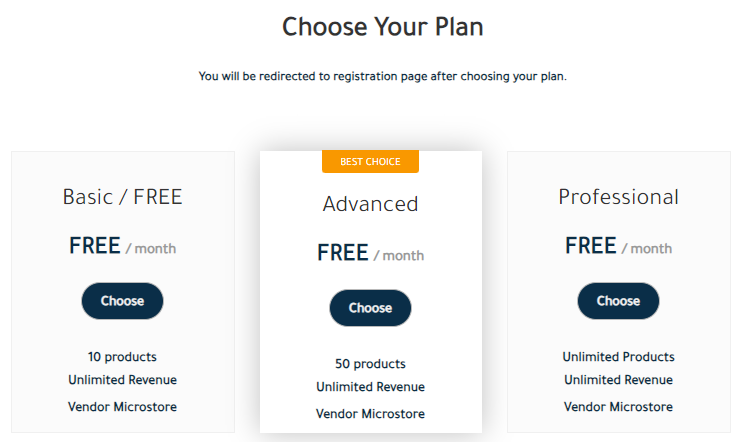
Vendors or Sellers’ subscription plans are formulated in a way to provide ease and relief to the Seller, there are no fixed costs, all plans are FREE to host, and some plans are FREE to sell also.
Chose the plan that suits your business more from the following subscription plans.
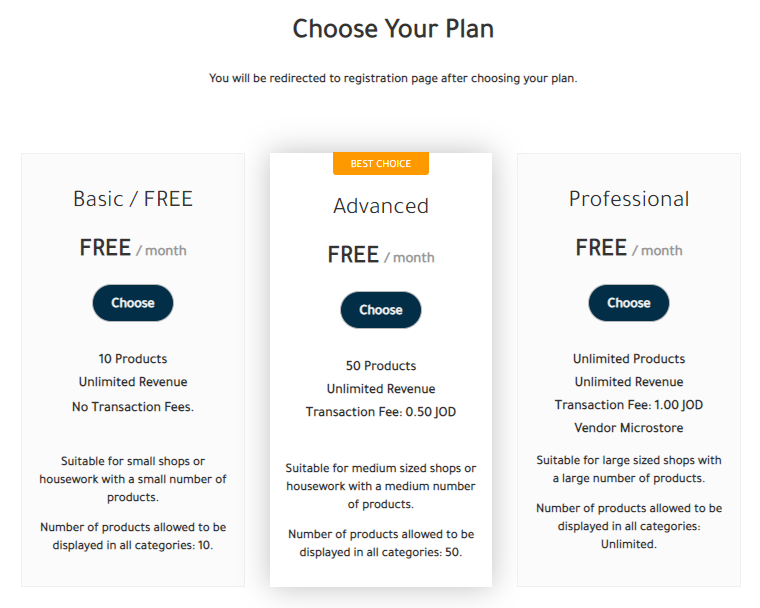
For a limited time, all subscription plans are without subscription fees.
Costs
Once a sell is made on the Marketplace, certain costs become incurred by the Seller, these costs are:
Subscription Fees
Depends on the selected subscription plan: Zero for the Basic plan, 0.5 JD for the Advanced and 1.0 JD for the Professional. This is a fixed fee on the order to cover the cost of hosting the Vendor’s / Seller’s store on the Marketplace.
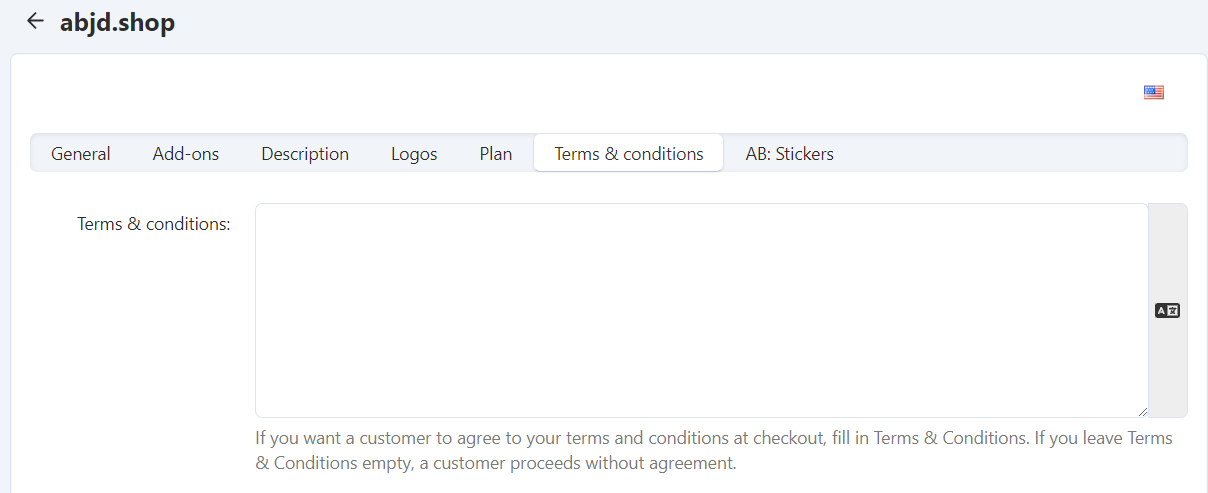
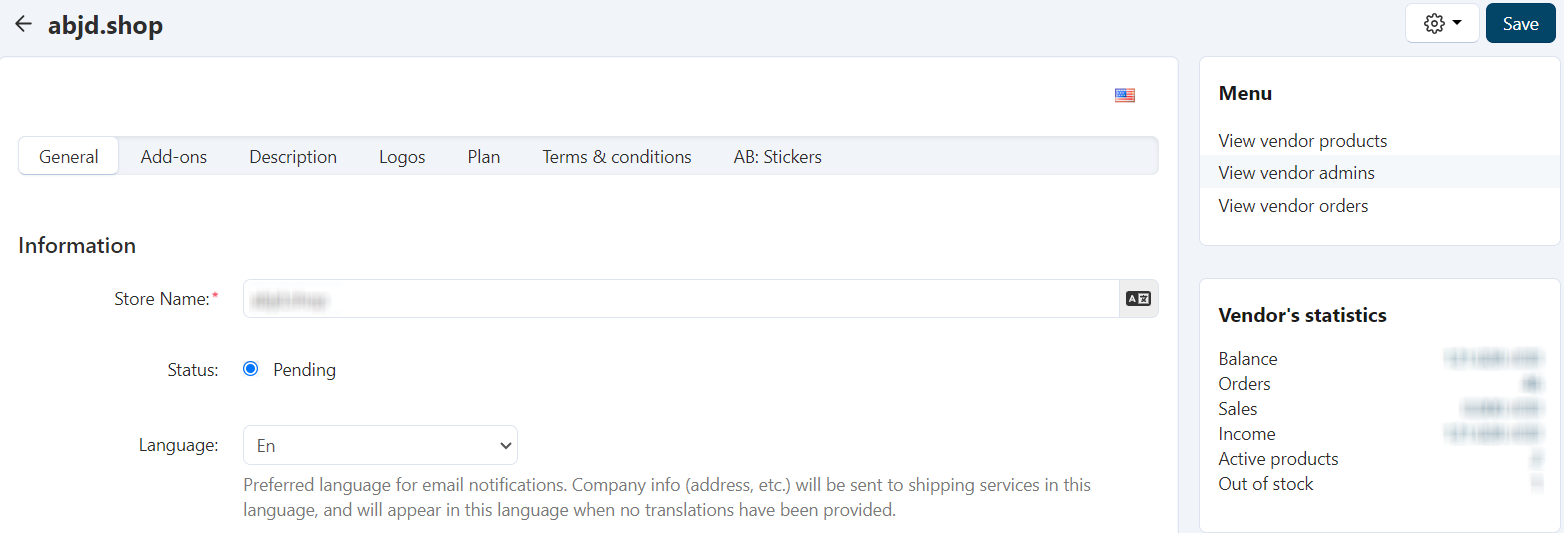
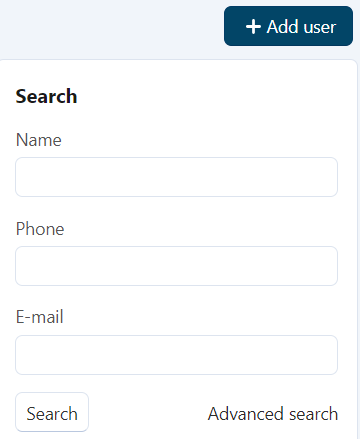
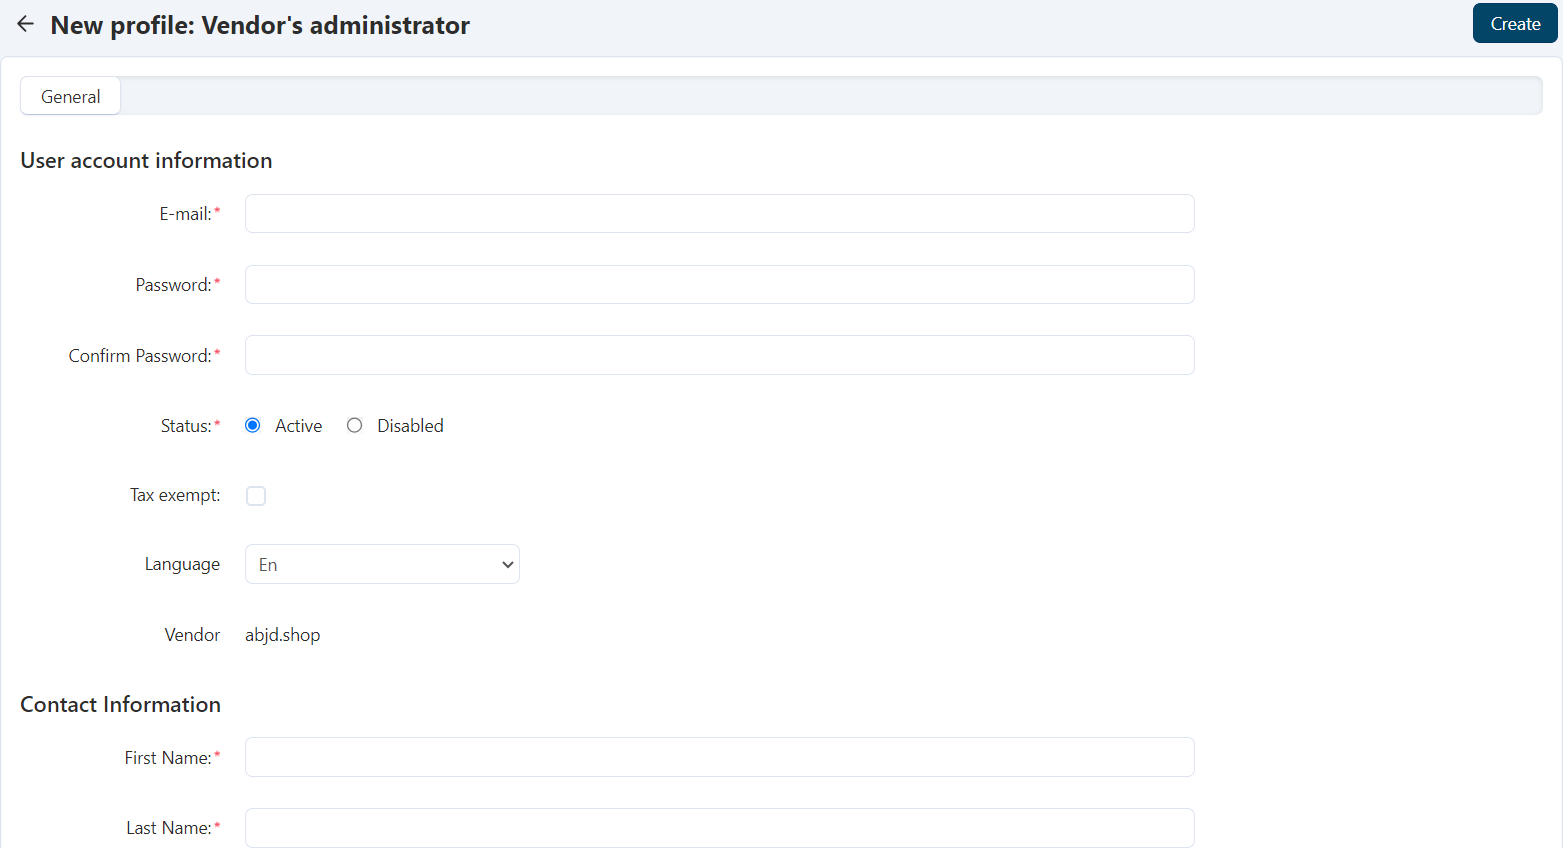
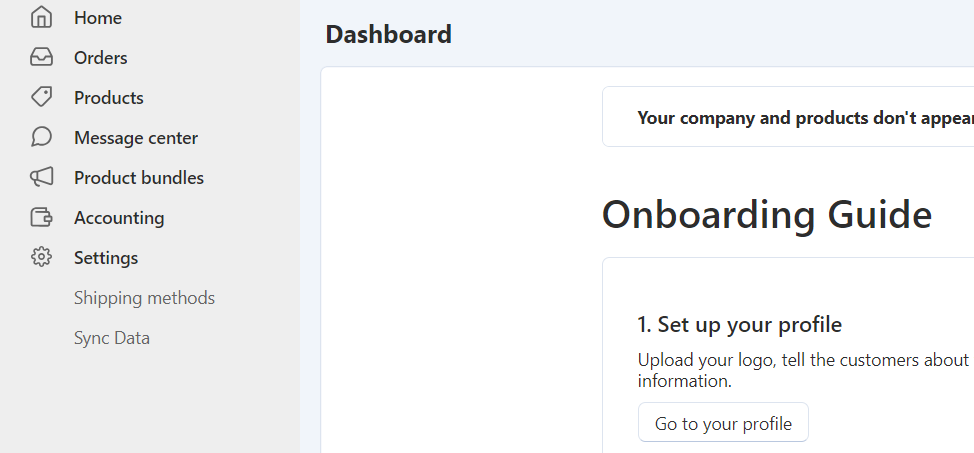
Profile Registration
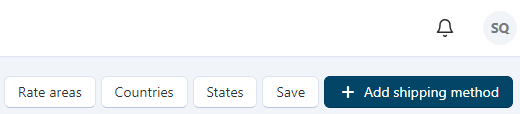
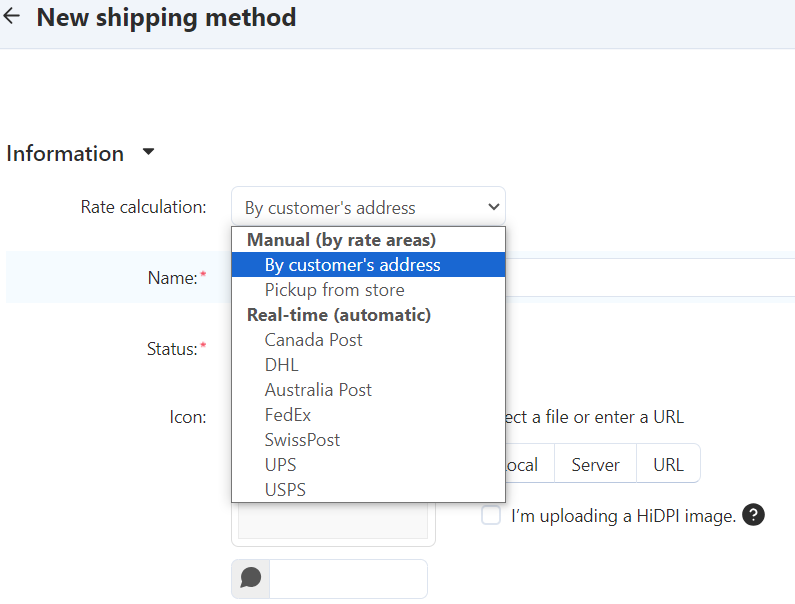
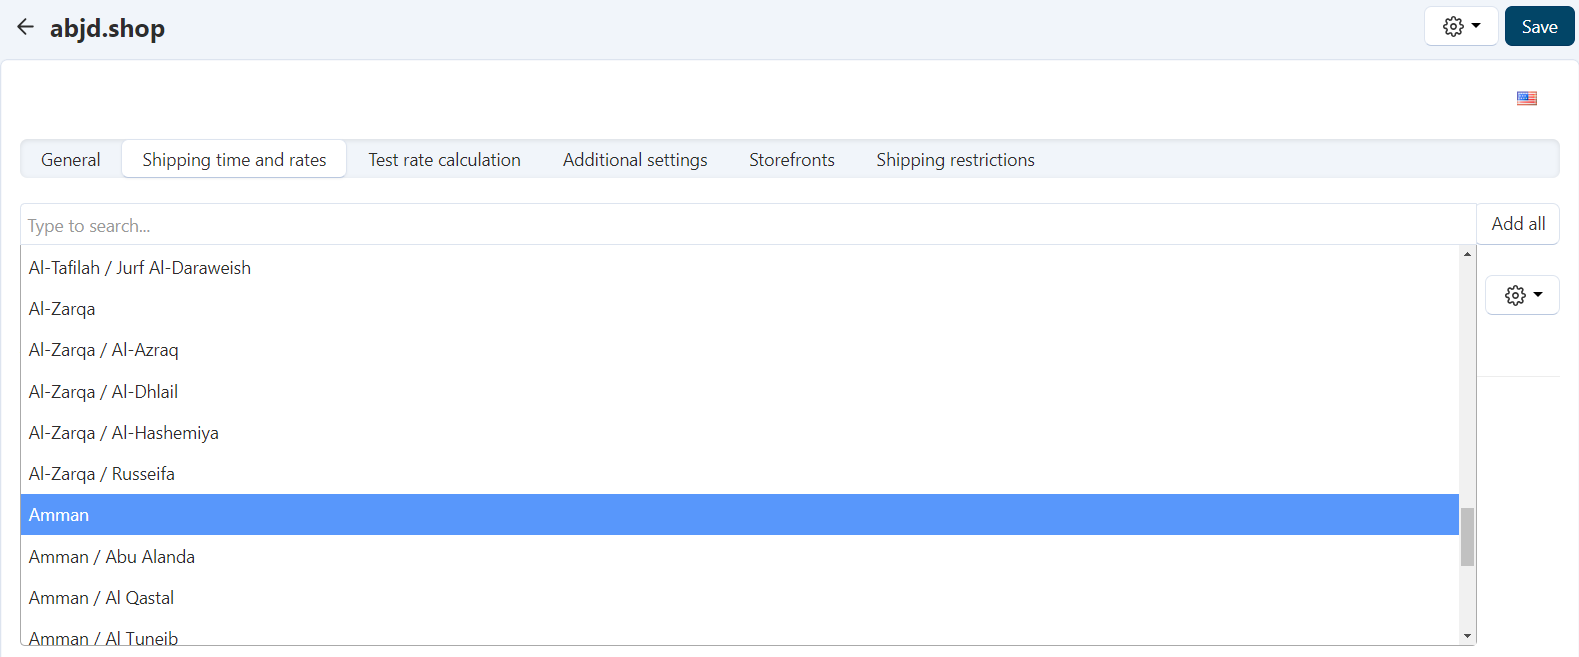
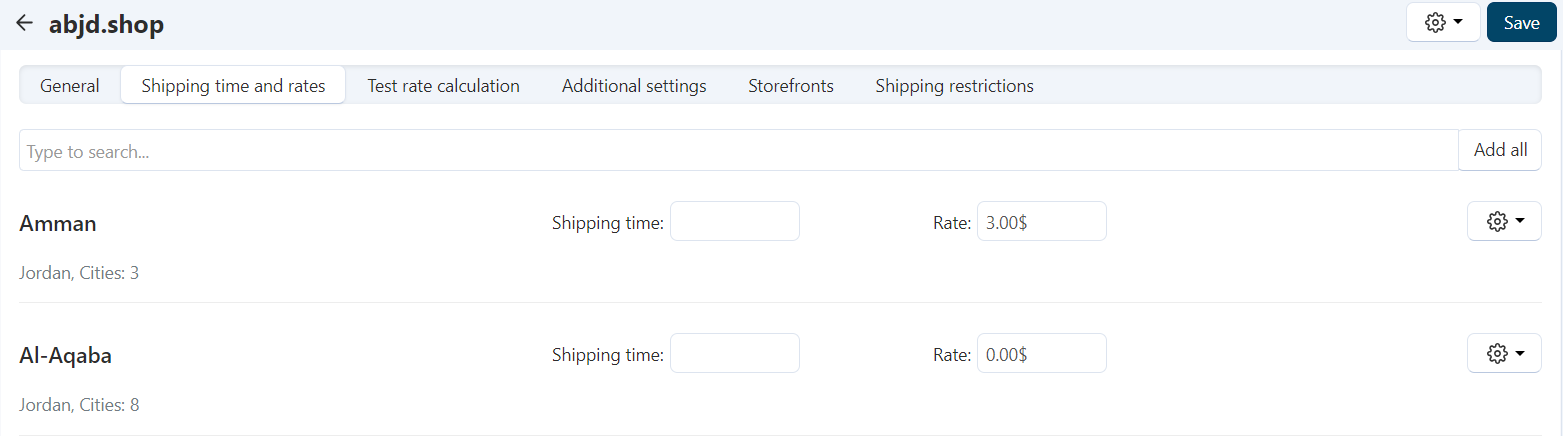
Setting Shipping Methods
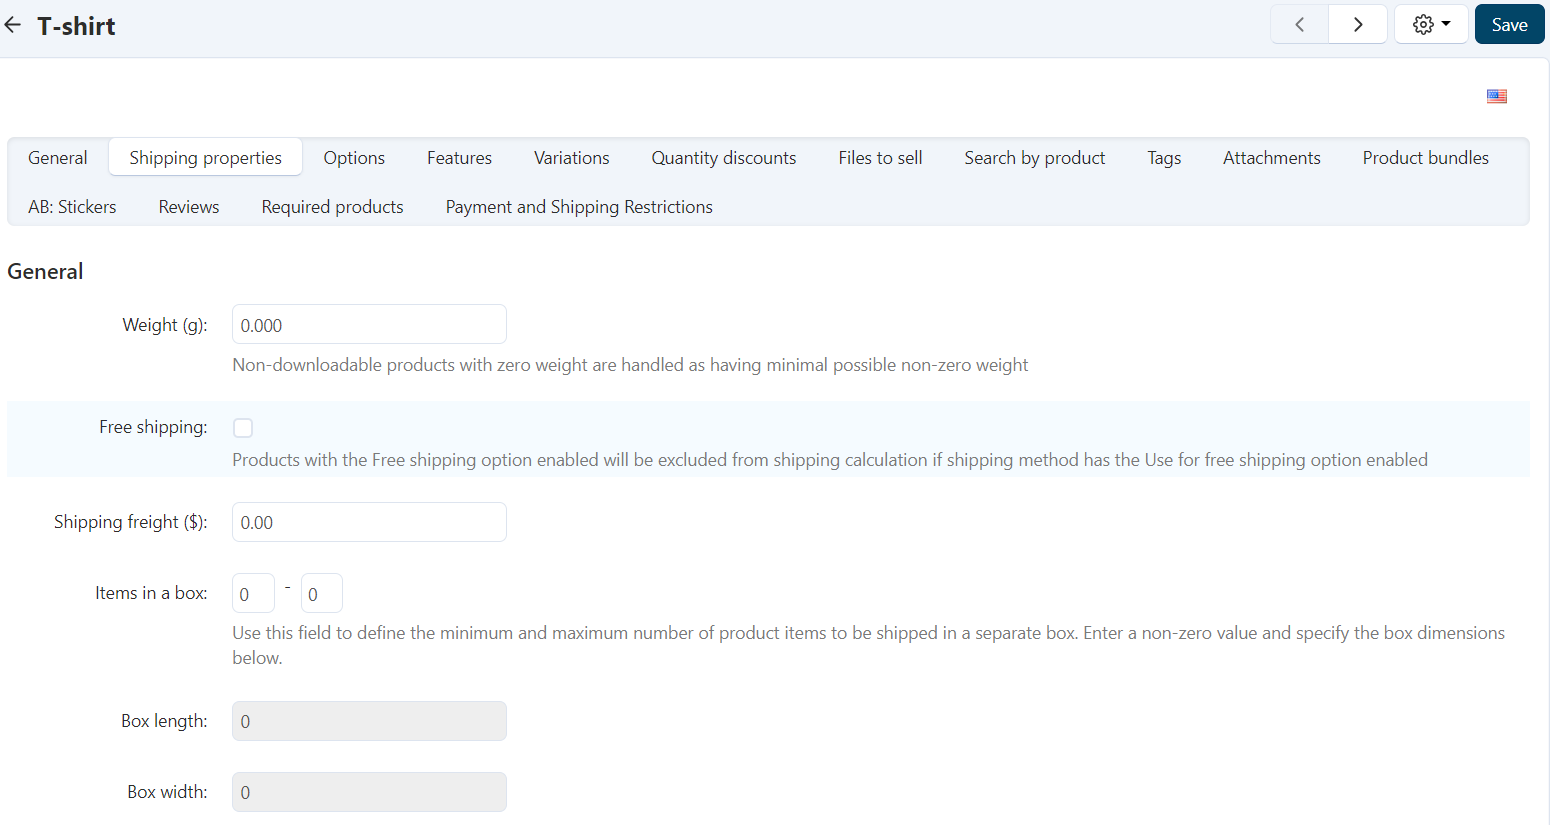
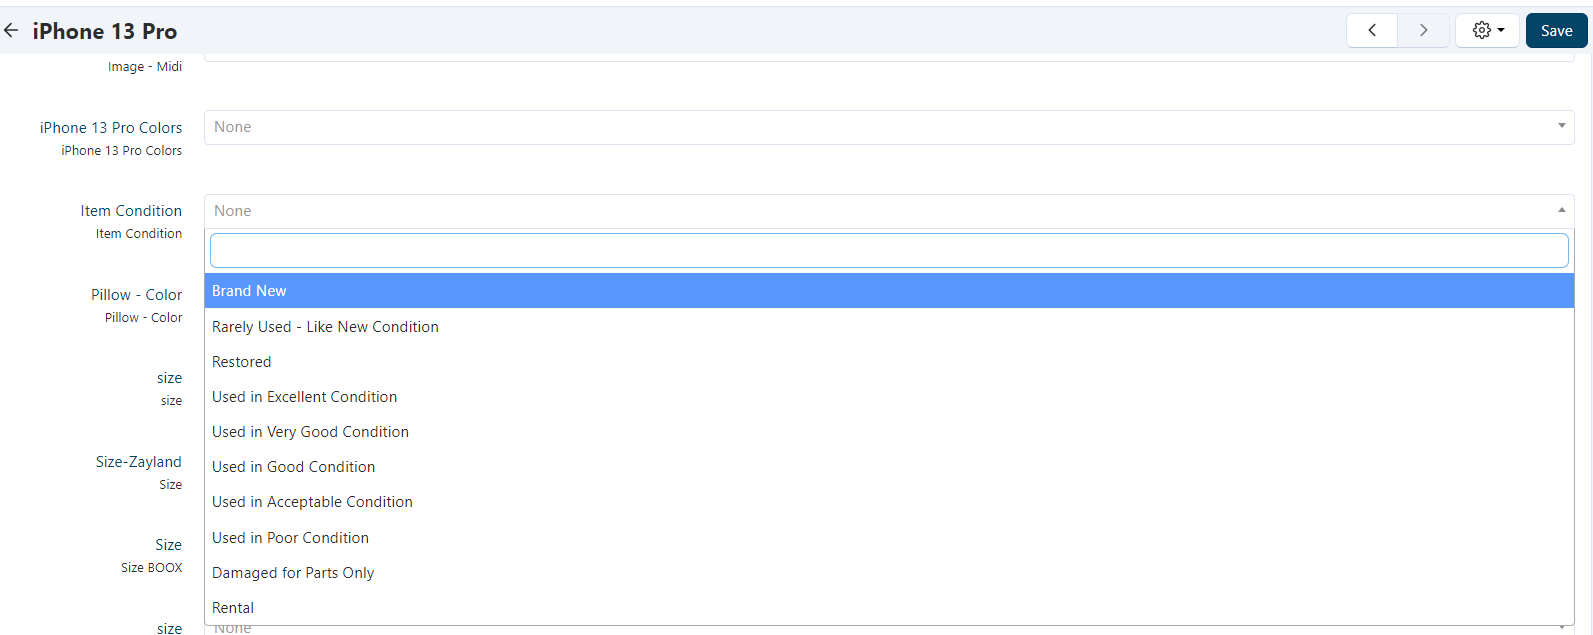
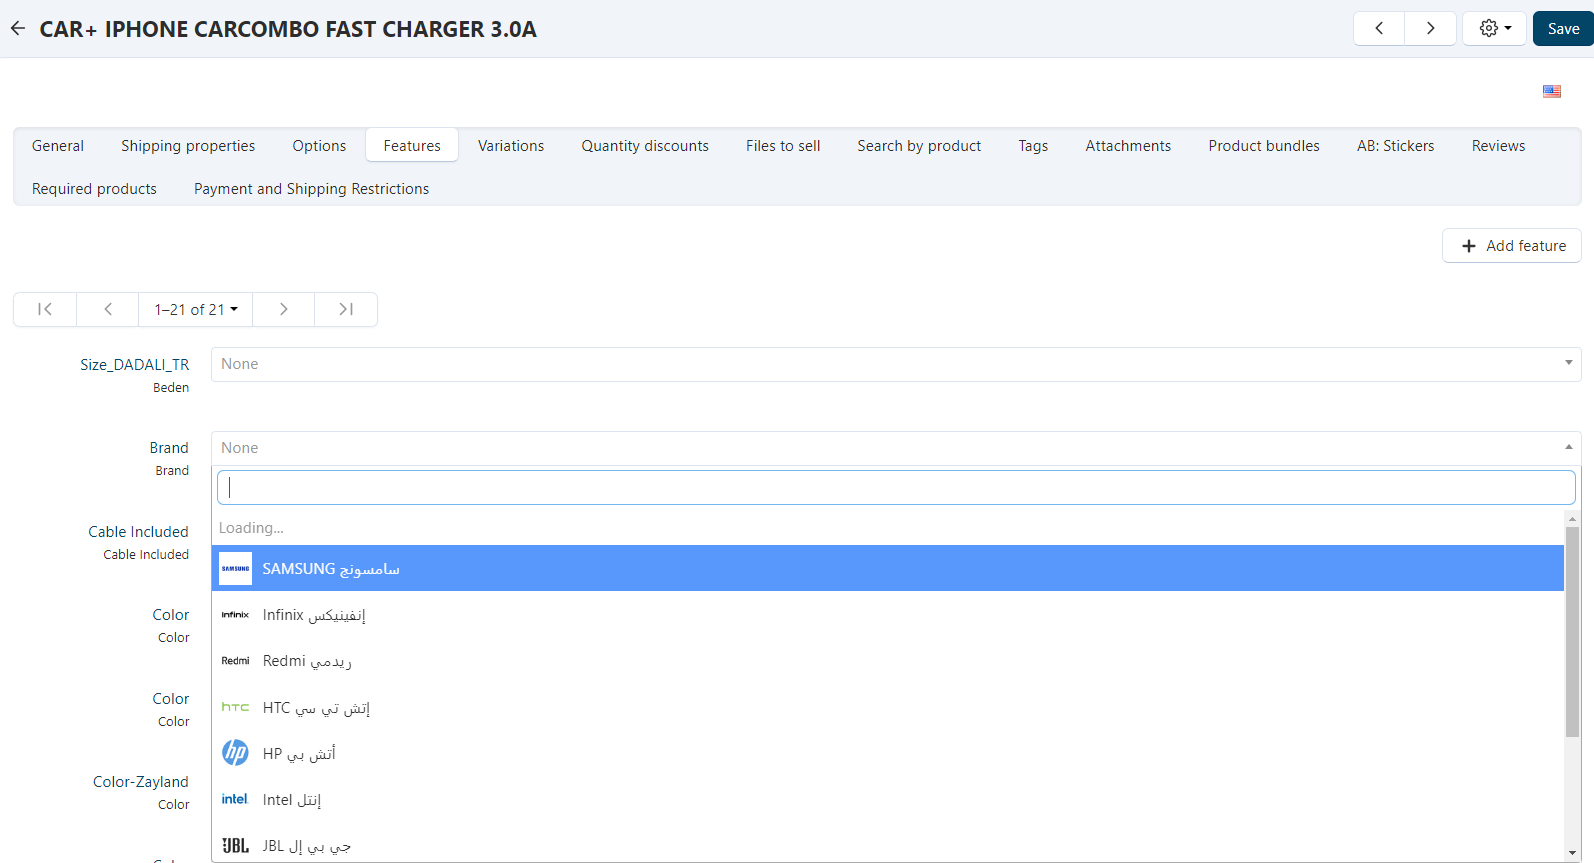
Adding Products
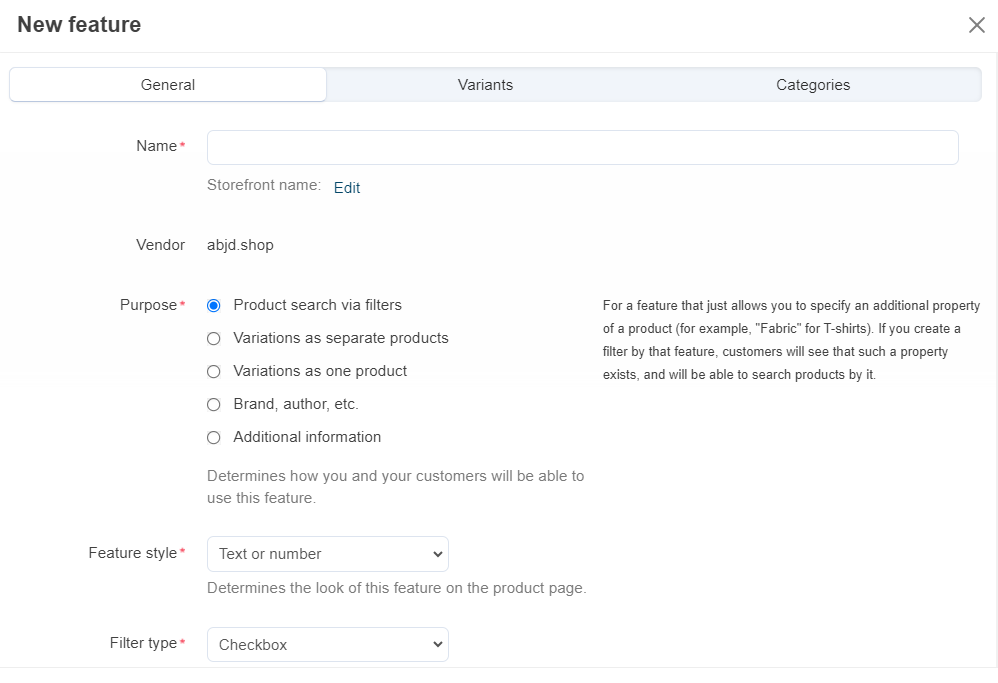
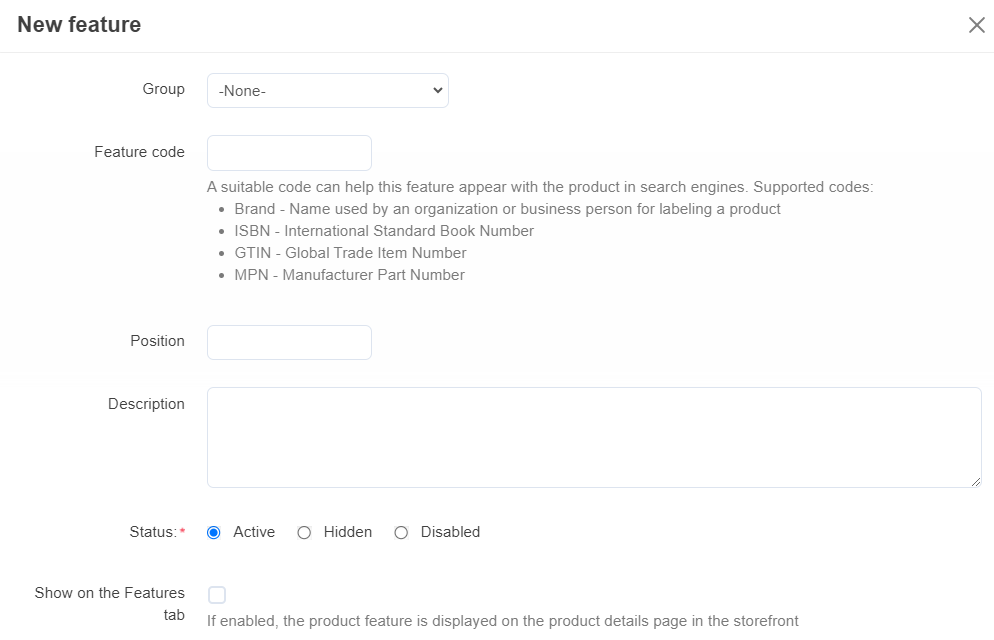
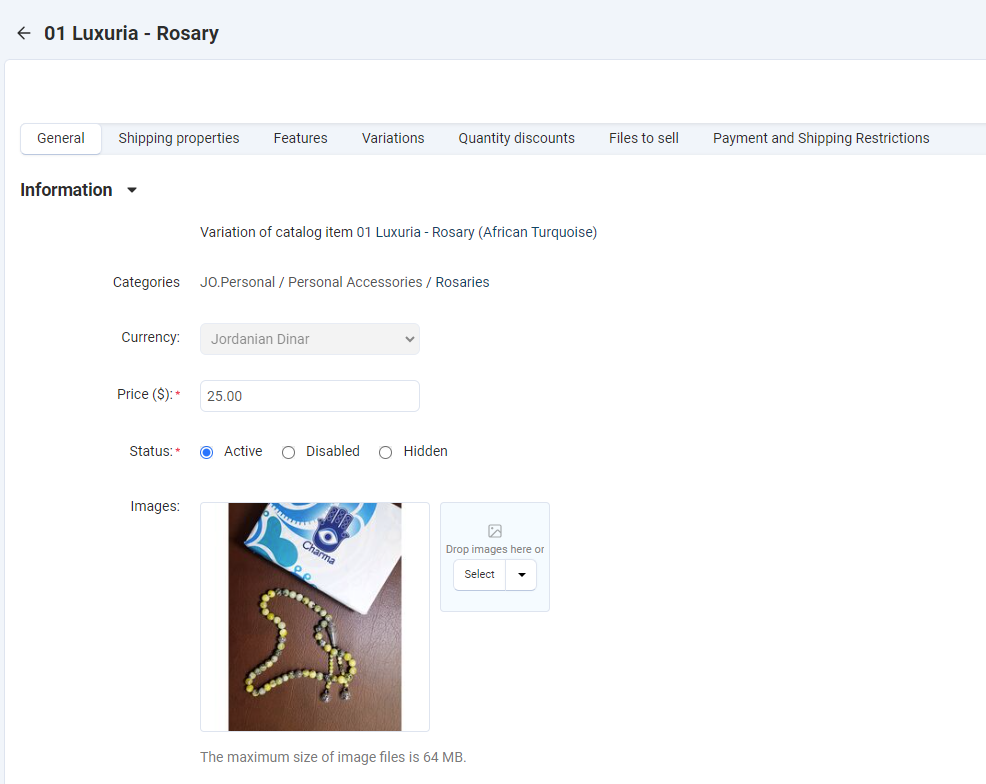
Adding A New Product
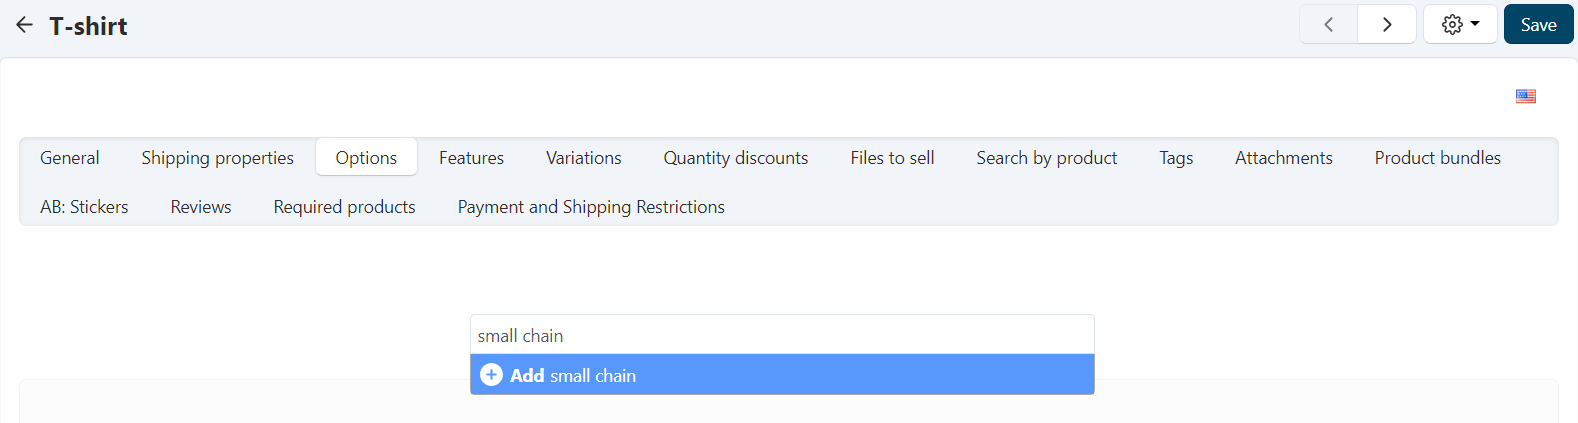
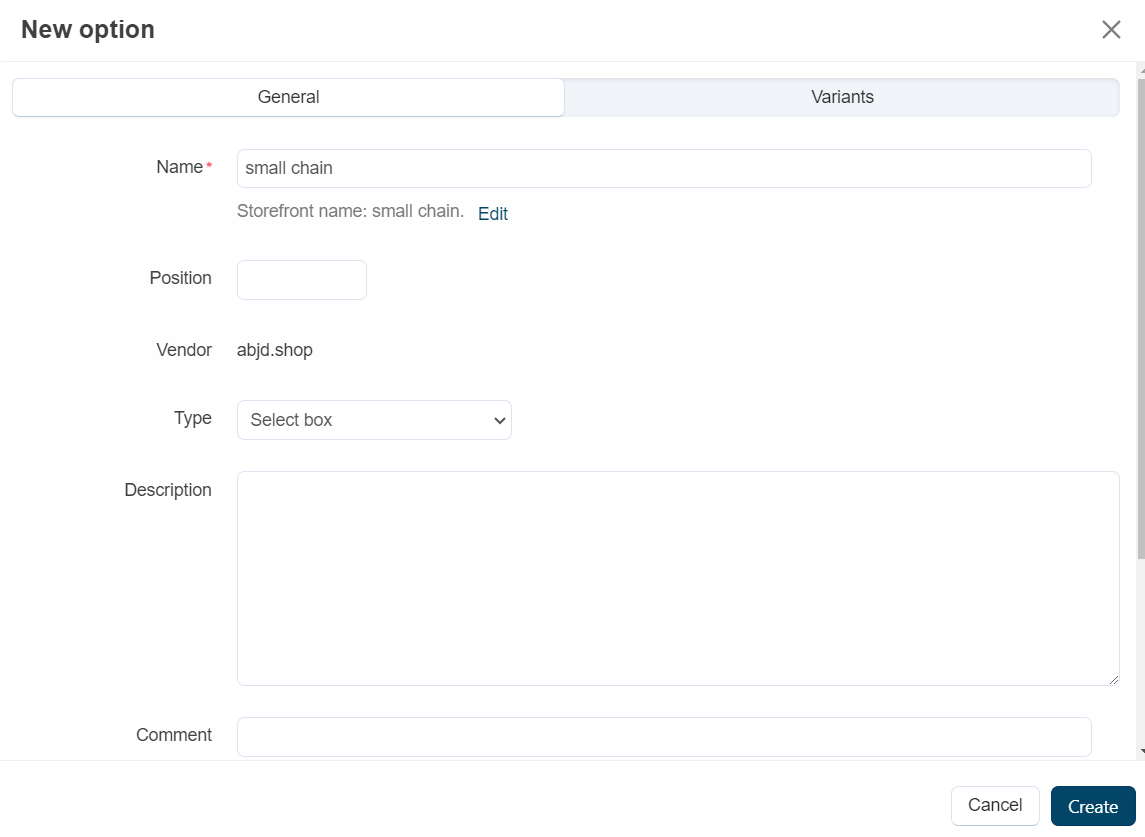
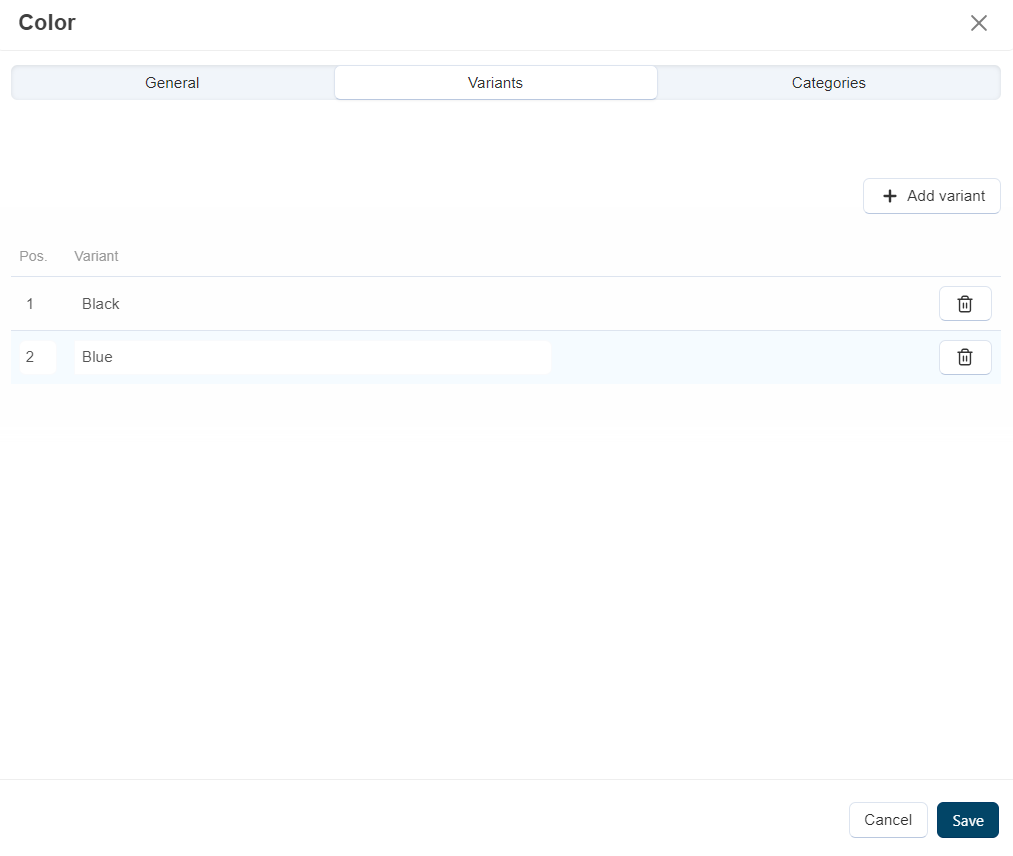
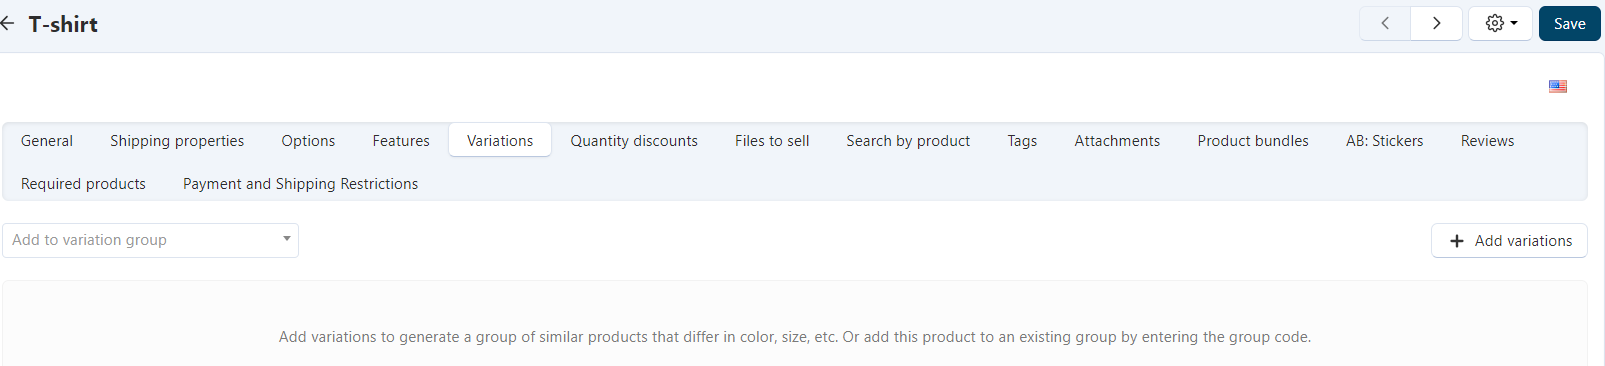
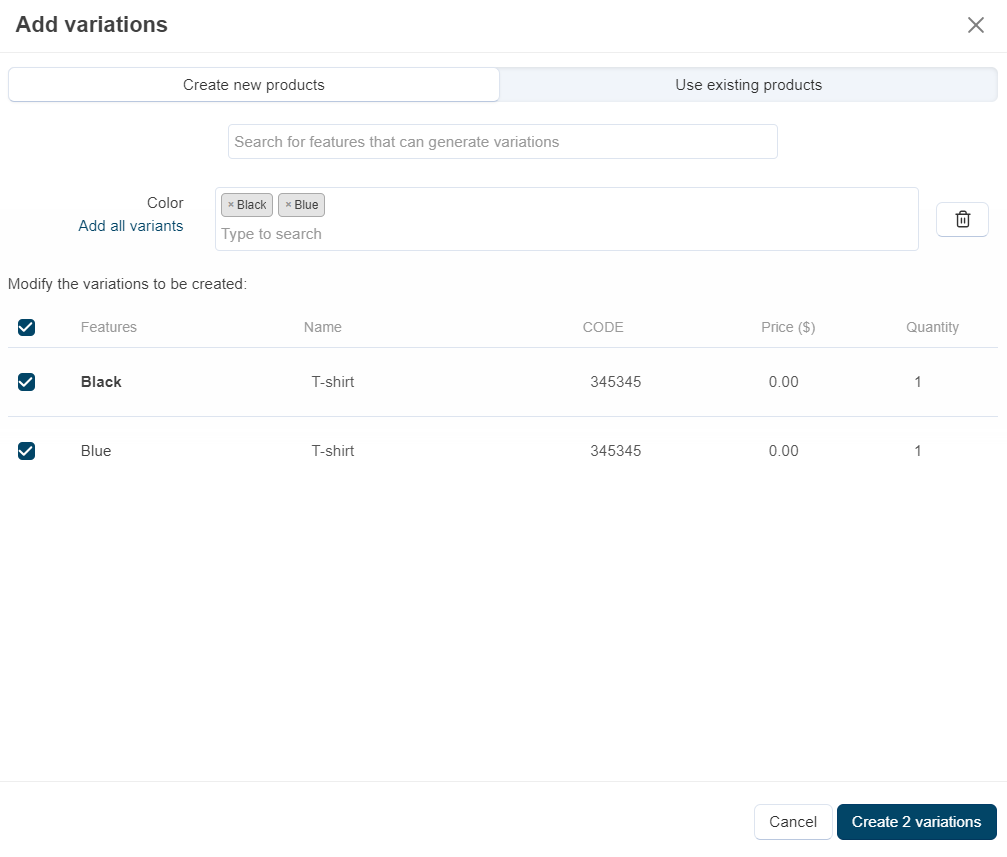
Adding Product Variants
Fulfilling Orders
Fulfilling Orders
1. When and order is placed by a customer, you will receive an email from [email protected] containing the order details, Customer address and final price.
2. Now you need to pack and ship your order, we recommend you contact the Customer to confirm the address prior to shipping.
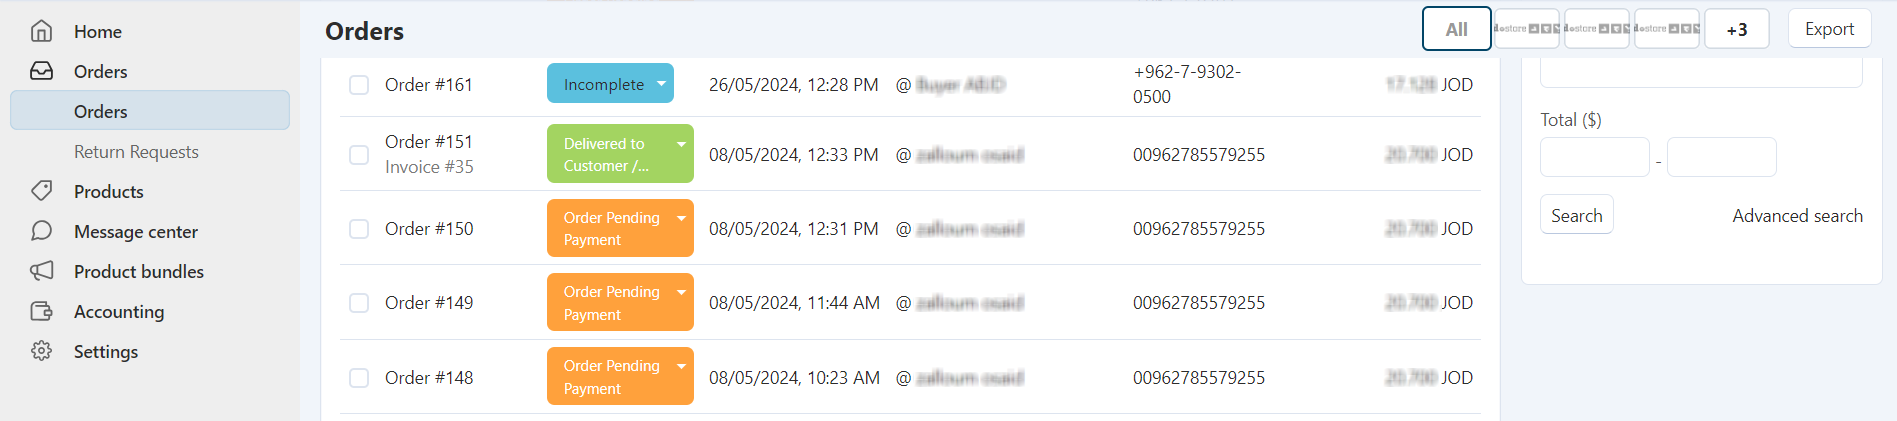
3. In the Orders page you can manage and view the order and change its status as per the actual progress.
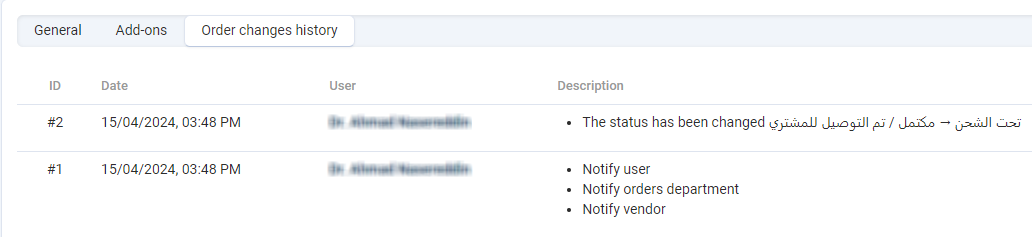
You can view the history of your order status changes on the “Order Changes History” tab.
4. You can open the order and view the details by clicking the Order Id.

If you are using a carrier service, you can enter the tracking number in the tracking number field at the bottom right.
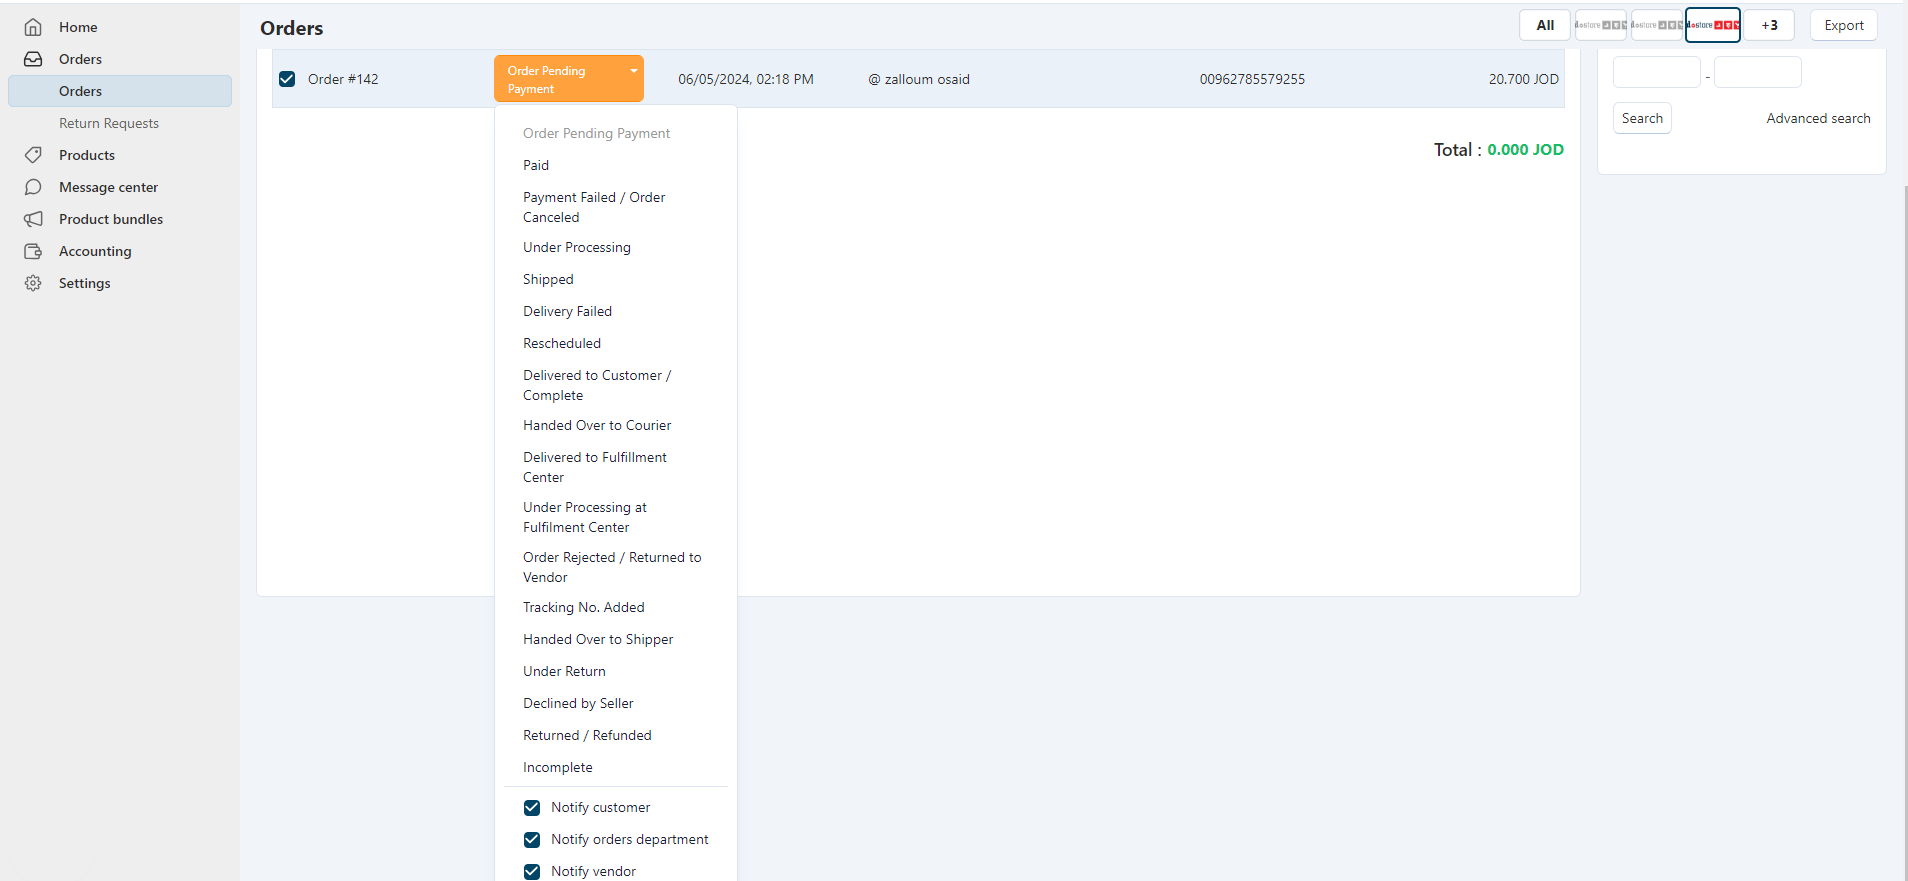
5. Change the status of the order as the fulfillment progress by clicking on each status from the list, the Marketplace and the buyer will be notified of this change.
Note: the order value won’t be added to the Vendor / Seller account balance unless the order status reaches to Complete.
The Seller is responsible for updating the fulfillment progress and it will require confirmation by the Customer once Complete.
6. The available Order Statuses are as follows:
Status Notes
Order Received System Generated
Paid System Generated
Payment Failed System Generated
Under Processing Manual by Vendor / Seller
Shipped Manual by Vendor / Seller
Delivery Failed Manual by Vendor / Seller
Rescheduled Manual by Vendor / Seller
Delivered / Complete Manual by Vendor / Seller
Declined by Seller Manual by Vendor / Seller / by Marketplace
Under Return Manual by Vendor / Seller / by Marketplace
Returned / Refunded Manual by Vendor / Seller / by Marketplace
If the Seller wants to cancel or decline on the order for reasons like stock depletion or any other reason, then proceed directly to Declined by Seller status. The Customer will be refunded by the Marketplace and the Vendor / Seller will be charged the Marketplace costs.
Returns and Refunds
Returns and Refunds
It is possible that Customers will ask for a Return or a Refund for a specific order within 48 hours from order completion.
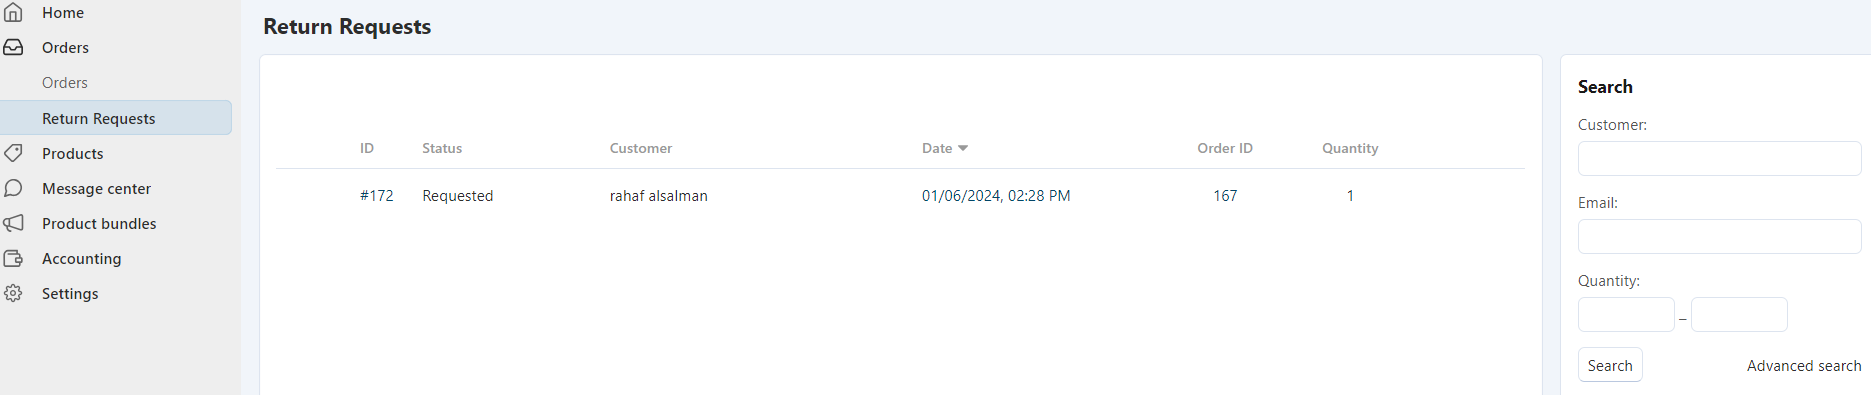
When the Customer makes a Return / Refund request, you will receive an email containing the information of what items the Customer wants to Return or Refund, the quantity of each item and the reason why they want to return each item, you can view the return request by going to Orders-> Return Requests on the side bar, click the ID number of the desired return request, now you can choose the action you want to make for each requested item.
-
If the item was requested for “Replace” it will have the initial status “Under Processing”, after that you can choose one of the following:
- Replaced / Repaired Successfully: in case the replacement or repair is done successfully.
- Replacement / Repair Unavailable: in case the replacement or repair is not available, in this case the admin will change the return request from “Replace” to “Refund”.

-
If the item was requested for “Return / Refund” it will have the initial status “Under Processing”, after that you can choose one of the following:

- Request Unjustified: in case the Customer’s request is unjustified.
- Replacement / Repair Unavailable: in case the replacement or repair is not available.
- Item Withdrawn: you must select this action when the item is withdrawn from the Customer successfully.
- The admin will process the Refund to the Customer.
- Replacement / Repair Available: in case the item can be repaired or replaced, with confirmation from the Customer, the admin will change the request to “Replace”.
- Replaced / Repaired Successfully: in case the replacement or repair is done successfully.
- If Replacement or Repair fail, select Replacement / Repair Unavailable.

Sales Tax
Sales Tax
The Marketplace does not offer Sales Tax calculation as not all Vendors / Sellers / products are subject to Sales Tax, hence, Vendors / Sellers that are subject to Sales Tax must upload their product price as Sales Tax inclusive.
Sales Tax is the responsibility of the Seller, he shall be responsible for issuing his own invoices detailing the Sales Tax in addition to its payment to the respective authorities. Order summaries issued by the Marketplace are in the name of the Seller and include the Seller’s Sales Tax registration number and Sales Tax details as provided by him under his own responsibility. The Marketplace acts as a facilitation and marketing platform not as a Seller
Invoicing
Invoicing
The Vendor / Seller must issue an official invoice for each order made on the Marketplace; the invoice must have the same value as the order summary. If the Vendor / Seller is subject to Sales Tax, the invoice should provide details of the Sales Tax as per the governing laws.
The Vendor / Seller must provide a copy of the invoice to the Customer and Marketplace, orders not covered by official invoices will not be paid to the Vendors / Sellers.
In return, and after the successful completion of order fulfillment, the marketplace shall issue a sales tax invoice to the seller for the amounts charged by the marketplace, where the seller can clear it in his sales tax account.
Accounting
Accounting
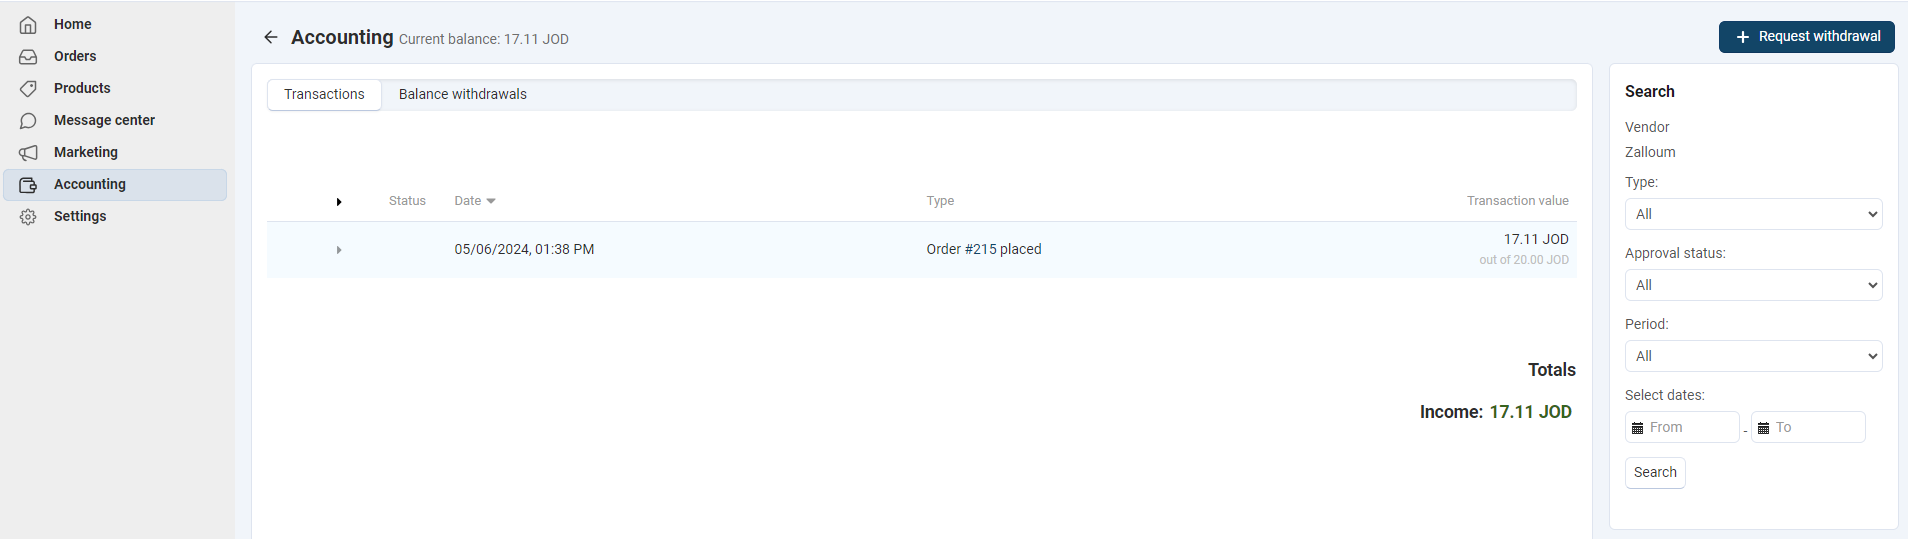
In the Accounting page Transactions tab, you can view your total income, income from each order and the extra charges from the Marketplace.
Balance Withdrawals
Balance Withdrawals
The Marketplace does not pay Vendors / Sellers unless they request payment, this is done via balance withdrawals.
Payment to Vendors / Sellers are made every Thursday and include balance withdrawals made on the week before as per the following payment cycle.
F S S M T W T F S S M T W T
Balance Withdrawal Requests Clearing Processing PAY
In the Balance Withdrawals tab, you can view all your balance withdrawals from the Marketplace.

You can request a balance withdrawal by clicking the "Request withdrawal" button on the top right.
Enter the desired value and add any comments if needed.

Balance withdrawals should be under or equal to the Vendor / Seller available balance sum.
Promotions
Promotions
The Marketplace offers Vendors / Sellers an easy way to make promotions as follows:
All promotions are free and made based on written requests from Vendors / Sellers and administered by Marketplace Administrators.
Promotion Conditions
On Specific Product
On Coupon Code
On Specific Product + Feature
On Specific Product + Coupon Code
On Specific Product + Customer Birthday
On Specific Product + Feature + Coupon Code
On Specific Product + Feature + Customer Birthday
On Specific Product + Feature + Customer Birthday + Coupon Code
Promotion Results
Give Product Discount
Give Coupon
Give Free Shipping
Give Free Products
Advertisements
Advertisements
The Marketplace offers Vendors / Sellers an easy way to advertise their products, campaigns, offers and special promotions.
The available ways are as follows:
- Featured Items Scroller Display product in Featured Items Scroller on Main Page Duration: 3 Days Price: 30 JD
- Marketplace Banners
- Email Shots
To all Marketplace members (Customers & Vendors / Sellers) (Image Size 800x1000px): Price 50.00 JD
All prices are subject to the applicable Sales Tax.
Appendix A – Images Standards
Appendix A – Images Standards
As a Vendor / Seller you have several images to upload to your store, below are the recommended sizes and proportions for each one of them:
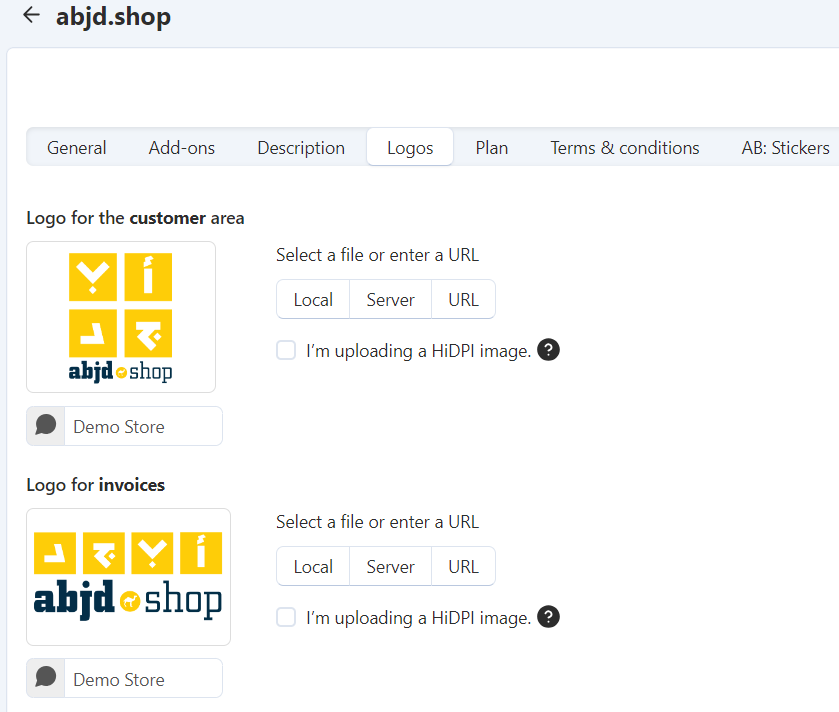
Logo Image for customer area: Size 60x240 px, Proportion 1:4
Logo image for emails: Size 420x420 px, Proportion 1:1
Shipping Method Image: Size 60x240 px, Proportion 1:4
Product Image: Size 420x420 px, Proportion 1:1
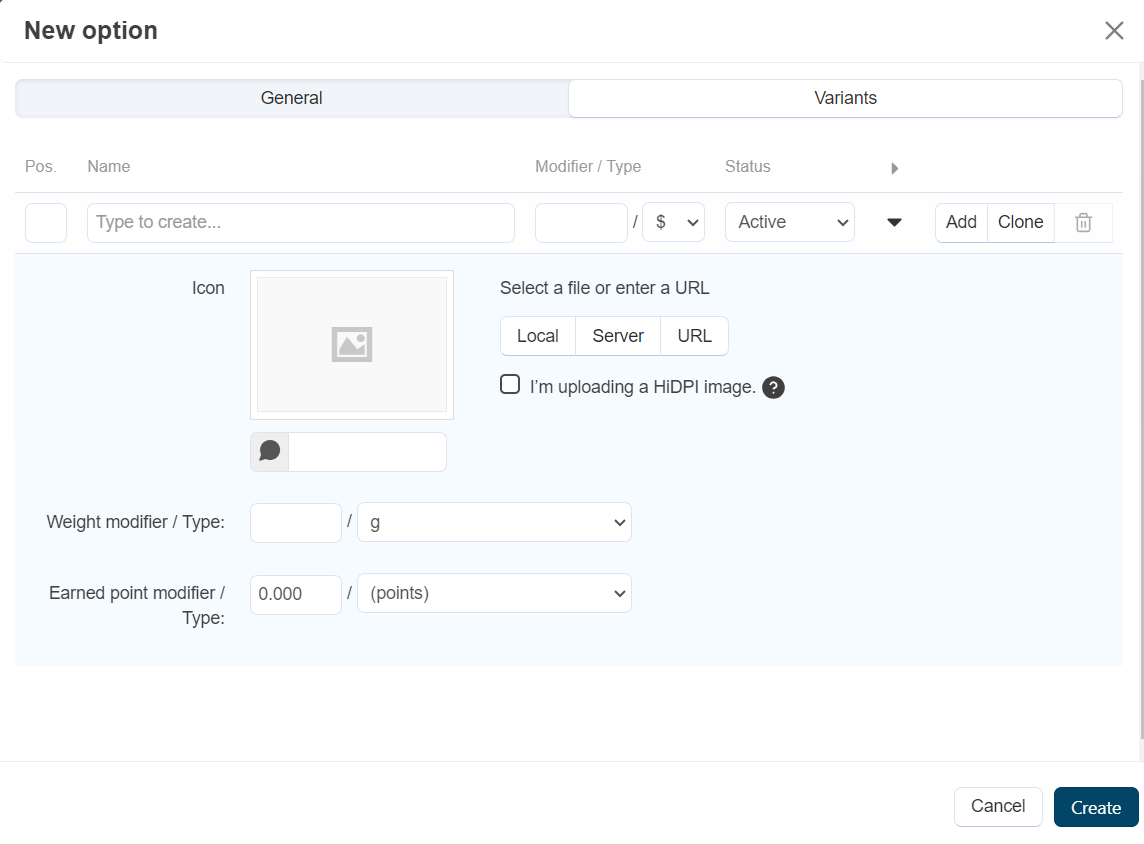
Option Image: Size 420x420 px, Proportion 1:1
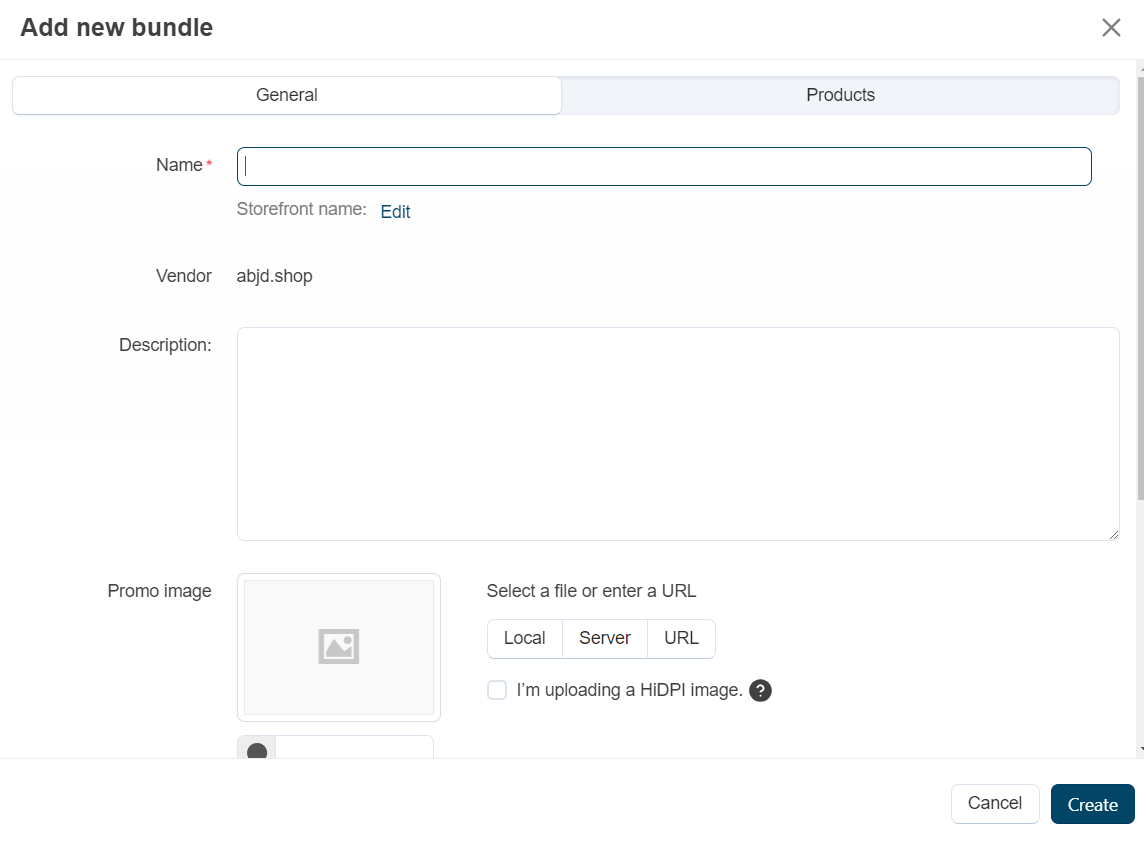
Product Bundles Image: Size 420x420 px, Proportion 1:1
You may increase the size of some images to enhance the resolution, however, you should maintain the proportions.
Try to upload clean image to enhance your sales chances as image affect greatly the Customer’s experience, if you face trouble cleaning your images, try using some 3rd party services like www.remove.bg
Appendix B – Product Categories
Appendix B – Product Categories
Automotiveالمحركات
Automotive Servicesخدمات السيارات
Autosالسيارات
Busesالباصات
Trucksالشاحنات
Vansالفانات
Pick-Upsالبكبات
Otherغيرها
Tyresالإطارات
Automotive Parts & Accessoriesقطع وإكسسوارات السيارات
Accessoriesالإكسسوارات
Body Partsقطع الهيكل
Electrical & Electronic Partsالقطع الكهربائية والإلكترونية
Interior Partsالقطع الداخلية
Mechanical Partsالقطع الميكانيكية
Otherغيرها
Motorcycles & Scootersالدراجات النارية والسكوترات
Accessoriesالإكسسوارات
Helmets الخوذ
Motorcyclesالدراجات النارية
Scootersالسكوترات
Otherغيرها
Home & Officeالمنزل والمكتب
Art Productsمنتجات الفنون
Paintingsاللوحات الفنية
Paints & Painting Toolsمواد وأدوات الرسم
Sculpturesالمنحوتات
Otherغيرها
Building Materialsمواد البناء
Accessoriesالإكسسوارات
Adhesivesاللواصق
Aggregates & Sandsالحصمة والرمل
Bathroom Ceramicsأطقم الحمامات
Boilers & Burnersالبويلرات والحارقات
Cement Productsمنتجات الإسمنت
Doorsالأبواب
Faucetsالحنفيات
Groutsالروبة
Marble & Graniteالرخام والجرانيت
Paintsالدهانات
Pipes & Fittingsالمواسير والقطع
Plastic Productsمنتجات البلاستيك
Pumps & Motorsالمضخات والمحركات
Radiatorsالراديترات والمشعات الحرارية
Sealantsمانعات التسرب
Shuttersالأباجورات
Sinksالمجالي
Steel Productsمنتجات الحديد
Tanksالخزانات
Tilesالبلاط
Windowsالشبابيك
Wood Productsمنتجات الخشب
Otherغيرها
Furnitureالأثاث
Accessoriesالإكسسوارات
Beds & Beddingالأسرة وأثاث النوم
Carpetالسجاد
Desksالمكاتب
Dining Setsأطقم الطعام
Draperyالبرادي
Drawersالأدراج
Fabricsالأقمشة
Mattressesالفرشات
Office Furnitureالأثاث المكتبي
Safesالخزنات والقاصات
Sofas & Chairsالكنب والكراسي
Tablesالطاولات
Wardrobes & Closetsالخزائن
Otherغيرها
Massage Chairs & Large Equipment أجهزة وكراسي المساج الكبيرة
Home Decor & Accessories ديكورات وإكسسوارات المنزل
Accessoriesالإكسسوارات
Artificial Plantsالنباتات الصناعية
Bedding & Linenالأغطية والشراشف
Candlesالشموع
Cushionsالمخدات
Natural Plantsالنباتات الطبيعية
Parquetالباركيه
Towelsالبشاكير
Wallpaperورق الجدران
Otherغيرها
Kitchen Productsمنتجات المطبخ والأدوات المنزلية
Accessoriesالإكسسوارات
Kitchen Toolsأدوات المطبخ
Tableware & Utensilsتجهيزات طاولة الطعام
Otherغيرها
Luggageالحقائب
Hand Luggageالحقائب اليدوية
Storage Luggageحقائب التخزين
Travel Luggage حقائب السفر
Other غيرها
Office Products منتجات المكاتب
School Supplies اللوازم المدرسية
Office Supplies الأدوات المكتبية
Other غيرها
Stationery التوريدات المكتبية
Paper & Cardboard الورق والكرتون
Tools & Hardware العددوالأدوات والخردوات
Accessories الإكسسوارات
Hand Tools العدد اليدوية
Hardware الخردوات
Power Tools العدد الكهربائية
Safety Products منتجات السلامة
Other غيرها
Personal الشخصي
Apparel & Shoes الملابس والأحذية
Kids wear & Shoes ملابس وأحذية الأطفال
Coats المعاطف
Gloves القفازات
Hats الطواقي
Jackets الجاكيتات
Pajamas & Sleepwear ملابس النوم والبيجامات
Sandals الصنادل
Scarfs اللفحات
Shirts القمصان
Shoes الأحذية
Slippers الحفايات
Socks الجرابات
Sports Shoes أحذية الرياضة
Sportswear ملابس الرياضة
Suits & Sets البدلات والأطقم
T Shirts البلائز
Ties ربطات العنق
Trousers & Pants البنطلونات
Underwear الغيارات الداخلية
Other غيرها
Menswear & Shoes ملابس وأحذية الرجال
Abayas العباءات
Coats المعاطف
Dresses الأثواب
Gloves القفازات
Hats الطواقي
Jackets الجاكيتات
Koufyas الكوفيات والأشمغة
Pajamas & Sleepwear ملابس النوم والبيجامات
Sandals الصنادل
Scarfs اللفحات
Shirts القمصان
Shoes الأحذية
Slippers الحفايات
Socks الجرابات
Sports Shoes أحذية الرياضة
Sportswear ملابس الرياضة
Suits & Sets البدلات والأطقم
T-Shirts البلائز
Ties ربطات العنق
Trousers & Pants البنطلونات
Underwear الغيارات الداخلية
Other غيرها
Womenswear & Shoes ملابس وأحذية السيدات
Abayas & Jilbabs العباءات والجلابيب
Coats المعاطف
Dresses الفساتين
Gloves القفازات
Hats الطواقي
Jackets الجاكيتات
Kofiya - Hijab الإشاربات
Pajamas & Sleepwear ملابس النوم والبيجامات
Sandals الصنادل
Scarfs اللفحات
Shirts القمصان
Shoes الأحذية
Skirts التنانير
Slippers الحفايات
Socks الجرابات
Sports Shoes أحذية الرياضة
Sportswear ملابس الرياضة
Suits & Sets البدلات والأطقم
T Shirts البلائز
Trousers & Pants البنطلونات
Underwear الغيارات الداخلية
Other غيرها
Baby Products منتجات الأطفال
Baby Cleaning Products معدات وأدوات ومنتجات النظافة
Baby Monitors معدات اللاسلكي ومراقبة الأطفال
Car Seats كراسي السيارات
Cots الحاضنات
Diapers الحفاضات
Eating Chairs كراسي الطعام
Feeding Products معدات وأدوات ومنتجات الطعام
Healthcare Products معدات ومنتجات الرعاية الصحية
Infant Products منتجات الرضّع
Sterilizers المعقمات
Strollers العربايات
Walkers المشايات
Other غيرها
Beauty Productsمنتجات التجميل
Hair Products منتجات الشعر
Makeup Products منتجات المكياج
Nail Products منتجات الأظافر
Perfumes العطور
Wigs الشعر المستعار
Other غيرها
Health & Personal Care Products منتجات الصحة والعناية الشخصية
Hair Care Products منتجات العناية بالشعر
Skin Care Products منتجات العنايه بالبشره
Supplements المكملات الغذائية
Other غيرها
Jewelry المجوهرات
Accessories الإكسسوارات
Bracelets الأساور
Earrings حلق الأذن
Necklaces السناسيل
Rings الخواتم
Sets الأطقم
Other غيرها
Personal Accessories الإكسسوارات الشخصية
Accessories الإكسسوارات
Glasses and Contact Lenses النظارات والعدسات اللاصقة
Keychains ميداليات المفاتيح
Piercings الأحلاق
Rosaries المسابح
Hand Bags, Wallets & Laptop Cases المحافظ وحقائب اليد والحواسيب
Other غيرها
Personal Care Appliances أجهزة العناية الشخصية
Accessories الإكسسوارات
Foot Care Appliances أجهزة العناية بالقدم
Hair Dryers السشوارات
Hair Straighteners مملسات الشعر
Massage Tools أجهزة المساج
Shaving Tools & Products منتجات وأدوات الحلاقة
Other غيرها
Watches الساعات
Accessories الإكسسوارات
Analogue Watches الساعات العادية
Digital Watches الساعات الرقمية
Fitness Trackers الساعات الرياضية الذكية
Smart Watches الساعات الذكية
Other غيرها
Supermarket السوبرماركت
Cleaning & Chemical Products المنظفات والكيماويات
Chemical Products الكيماويات
Cleaning Products المنظفات
Hygiene Products المعقمات
Sanitary Paper Products منتجات الورق الصحي
Gloves قفازات
Other غيرها
Foods & Meals الأطعمة والوجبات الجاهزة
Ready Made Foods الوجبات الجاهزة
Frozen Meals الوجبات المجمدة
Nuts المكسرات
Sweets الحلويات
Other غيرها
Healthy Food and Supplements الأطعمة الصحية ومكملات الغذائية
Energy Drink مشروبات الطاقة
Healthy Drinks المشروبات الصحية
Supplements المكملات الغذائية
Energy Foods أطعمة الطاقة
Grocery البقالة والمواد التموينية
Bakery المخبوزات
Butchery اللحوم
Canned Food المعلبات
Chocolates & Sweets الشوكولاته والحلويات
Coffee القهوة
Dairy Products منتجات الألبان
Dates التمور
Deli قسم الديلي
Eggs البيض
Fish الأسماك
Frozen Foods الأطعمة المجمدة
Fruits الفواكه
Honey العسل
Juices العصائر
Legumes البقوليات
Oils & Ghee الزيوت والسمنة
Pasta & Noodles المعكرونة والنودلز
Rice الأرز
Snacks الوجبات الخفيفة
Spices البهارات
Sugar السكر
Tea & Herbs الشاي والاعشاب
Vegetables الخضروات
Water & Soft Drinks الماء والمشروبات والعصائر
Other غيرها
Disposable منتجات استخدام مرة واحدة
Cups أكواب
Gloves قفازات
Tableware & Utensils تجهيزات طاولة الطعام
Food packaging مواد حفظ وتغليف الطعام
Wrapping تغليف
Trash Bags أكياس نفايات
Storage Bags أكياس التخزين
Pet Products منتجات الحيوانات الأليفة
Accessories الإكسسوارات
Cages & Houses الأقفاص والبيوت
Pet Care Products منتجات العناية بالحيوانات
Pet Foods أطعمة الحيوانات
Other غيرها
Electronics الإلكترونيات
Cameras & Recorders الكاميرات والمسجلات
Accessories الإكسسوارات
Analogue Cameras الكاميرات التناظرية
Chromas الخلفيات
Digital Cameras الكاميرات الرقمية
Films & Filming Products الأفلام وموادها
Lighting Equipment معدات الإنارة
Microphones المايكروفونات
Mixers الخالطات
Stands & Holders الحوامل والمثبتات
Other غيرها
Large Appliances الأجهزة المنزلية الكبيرة
Air Conditions المكيفات
Dish Washers الجلايات
Dryers النشافات
Freezers الفريزرات
Hobs الغازات والطباخات
Home Theater أجهزة المسرح المنزلي
Ovens الأفران
Refrigerators الثلاجات
Televisions التلفزيونات
Washing Machines الغسالات
Other غيرها
Lighting & Electrical Products الإنارة ومنتجات الكهرباء
Cables الكوابل
Electrical Boards اللوحات الكهربائية
Electrical Switches & Outlets أباريز ومفاتيح الكهرباء
Lighting Bulbs لمبات الإنارة
Lighting Fixture وحدات الإنارة
Other غيرها
Mobile Phones & Tablets الهواتف المحمولة والتابلت
Mobile Phones أجهزة الهواتف المحمولة
iPads أجهزة أيباد
Tablets أجهزة التابلت
Other غيرها
Mobile Phones Accessories إكسسوارات الهواتف المحمولة
Chargers & Cables الشواحن والكوابل
Covers & Cases حوافظ الهاتف
EarPods & Earbuds السماعات اللاسلكية
Lighting الإضاءة
Memory Products منتجات الذاكرة
Other Speakers السماعات الأخرى
Power Banks بطاريات الشحن
Screen Protectors حوافظ الشاشة
Stands & Holders الحوامل
Wired Ear Speakers السماعات السلكلية
Other غيرها
PCs & Accessories أجهزة الكمبيوتر الشخصية وأكسسواراتها
Accessories الإكسسوارات
Desktop PCs أجهزة الكمبيوتر المكتبية
Laptops أجهزة اللابتوب
Monitors الشاشات
Printer الطابعات
Scanners الماسحات الضوئية
Switches & Routers أجهزة الشبكات
Other غيرها
Security & Automation Equipment أجهزة الحماية والأتمتة
Automation Products منتجات الأتمتة
DVRs & NVRs المسجلات
Security Systems Products منتجات أنظمة الحماية
Surveillance Cameras كاميرات المراقبة
Other غيرها
Small Appliances لأجهزة المنزلية الصغيرة
Air Purifiers أجهزة تنقية الهواء
Blenders الخلاطات
Coffee Grinders طاحنات القهوة
Coffee Makers صانعات القهوة
Electric Kettles السخانات الكهربائية
Electric Ovens الأفران الكهربائية
Fans المراوح
Food Processors محضرات الطعام
Fryers القلايات
Cookers طباخات
Grills الشوايات
Hand Mixers الخلاطات اليدوية
Humidifiers أجهزة ترطيب الهواء
Irons & Steamers المكاوي والمبخرات
Juicers العصارات
Meat Grinders فرامات اللحوم
Microwave Ovens أفران المايكرويف
Mixers العجانات
Satellite Receiver الرسيفرات
Toasters المحمصات
Vacuum Cleaners المكانس الكهربائية
Water Coolers مبردات المياه - الكولرات
Water Filters فلاتر المياه
heaters الدفايات
Carbonators ماكينات الكربنة
Other غيرها
Video Games & Consoles أجهزة وألعاب الفيديو
Accessories الإكسسوارات
Nintendo Consoles أجهزة نينتيندو
PlayStation Consoles أجهزة بلاي ستيشن
Video Games ألعاب الفيديو
Xbox Consoles أجهزة إكسبوكس
Other غيرها
Recreational المتعة والتسلية
Bicycles & Scooters (non motor) الدراجات الهوائية والسكوترات (بدون محركات)
Accessories الإكسسوارات
Bicycles الدراجات الهوائية
Scooters (non motor) السكوترات (بدون محركات)
Other غيرها
Books & Magazines (Paper) الكتب والمجلات الورقية
Books الكتب
Magazines المجلات
Other غيرها
Music Instruments الآلات الموسيقية
Amplifiers & Mixers مكبرات الصوت والأجهزة الصوتية
Music Players (MP3…etc) مشغلات الموسيقى
Musical Instruments الأدوات الموسيقية
Other غيرها
Outdoor Products منتجات الإستخدام الخارجي
Accessories الإكسسوارات
BBQs & Grills الشوايات والمناقل
Hiking & Camping Products منتجات التخييم والتسلق
Gardening Products منتجات الحدائق
Other غيرها
Sports Products أجهزة ومعدات الرياضة
Accessories الإكسسوارات
Fitness Equipment المعدات الرياضية
Hand Equipment & Tools المعدات والأدوات اليدوية
Nutrition Products الأغذية الرياضية
Power Equipment المعدات الرياضية الكهربائية
Swimming Products منتجات السباحة
Weights & Benches الأوزان والمقاعد
Other غيرها
Stamps & Collectibles الطوابع والمقتنيات
Coins العملات
Stamps الطوابع
Other غيرها
Party Products مواد الحفلات
Toys الألعاب
Accessories الإكسسوارات
Toys الألعاب
Other غيرها
Other غيرها
Digital Files الملفات الإلكترونية
Digital Books الكتب الإلكترونية
Digital Games الألعاب الرقمية
Digital Images الصور الرقمية
Licenses & Codes الرخص والكودات والإشتراكات
Music Files ملفات الموسيقى
Softwares البرامج الإلكترونية
Videos & Movies الفيديوهات والأفلام الرقمية
Other غيرها
Gift & Charging Cards بطاقات الهدايا والمشتريات والشحن
Charging Cards بطاقات الشحن
Gift Cards بطاقات الهدايا والمشتريات
Other غيرها
Discount Coupons كوبونات الخصم
Purchase Coupons كوبونات المشتريات
All Other Categories جميع الفئات الأخرى
Appendix C – Add Products in Bulk
Appendix C – Add Products in Bulk
You can add products in bulk via a csv file.
You must make any changes to features and variants before uploading, as they will be consolidated under one product and one variation group code. You will be able to add large quantities of products.
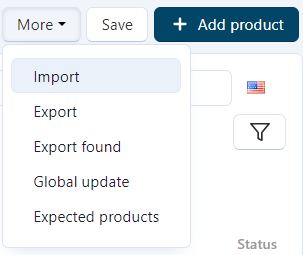
1. Click on the More button at the top right and choose “Import”
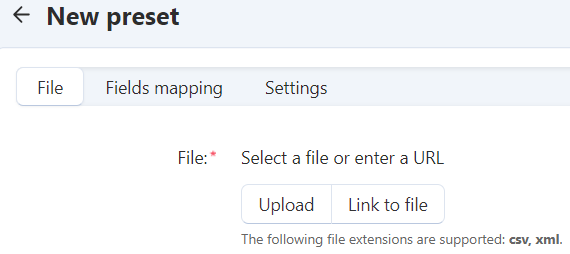
2. At the top right, click the +Add preset at the top right.

3. Select “Upload” to upload a csv file from your local machine.
4. the file format should be as shown in the following image.

- Where the first column contains the product name.
- Second column contains the product price.
- Third column contains the product code.
- Fourth column contains the product’s quantity (available stock).
- Fifth column contains the Category link, you can find all the categories link in the provided file “Categories links”, you can find the suitable category for your product, copy the link and paste it in the “Category” column.
- Sixth column contains the Product display image link (URL), or several links that are separated with three forward slashes “///”, if there is no available URL for your product’s image you can leave the cell empty and upload the images from your local machine for each product separately from the products page.
5. after selecting your file, click “Create” on the top right.

6. now go to the “Fields mapping” tab.

7. for the “PRODUCT PROPERTY IN MULTI-VENDOR” column, for each column name, select the property with the same column name as shown in the image below.

8. click “Import” at the top right.

You will receive a success message telling you how many products were successfully imported as shown below

If you received an error message, please try again and follow the instructions carefully and make sure the file extension is “csv”.
9. Your imported products will now be available at the products page and you can edit each product separately.
Register Now
Before registering, please make sure you have read and understood the Sellers Guide and reviewed all Policies and Terms and Conditions.
Go To Guide Register